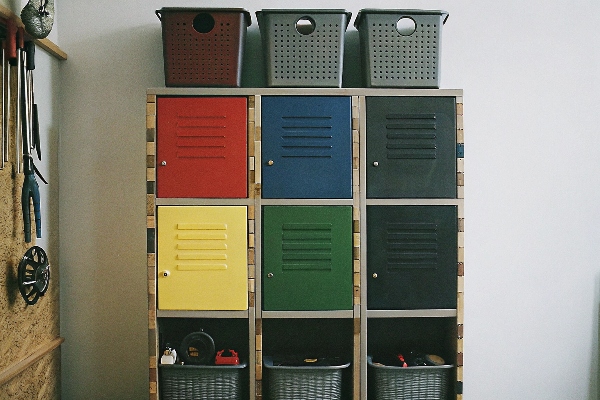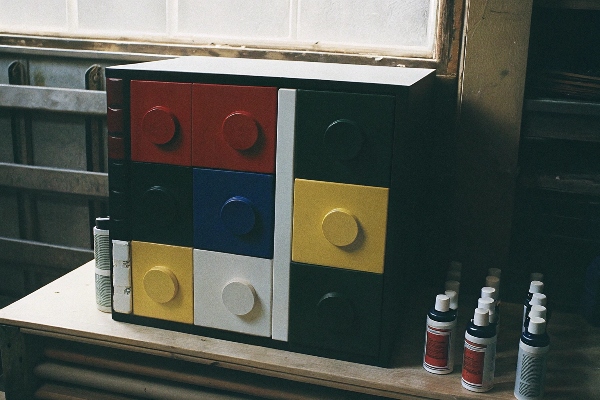
Turning an old locker into a Lego-themed storage cabinet combines creativity, functionality, and sustainability. This DIY project is perfect for upcycling enthusiasts, Lego fans, or anyone looking for a unique way to organize their space.
With careful planning and attention to detail, you can create a personalized, vibrant storage cabinet that reflects your love for Lego and showcases your creativity.
Let’s dive into the step-by-step process, covering everything from materials to finishing touches.
How to make a cabinet out of LEGO?

Transforming a locker into a Lego-inspired cabinet is more about recreating the iconic Lego look than building with actual bricks. The key lies in mimicking the bright colors and peg-like designs.
To achieve this, repurpose an old locker, use PVC caps or foam discs to replicate Lego pegs, and apply spray paint for bold, clean finishes.
Step-by-Step Process:
-
Prepare the Locker:
- Clean the surface and sand it to remove old paint or rust.
- Repair dents or holes using metal putty or wood filler.
-
Attach the Pegs:
- Arrange PVC caps in a grid pattern to resemble Lego studs.
- Use strong adhesives like epoxy to secure them.
-
Paint the Cabinet:
- Apply a base coat using spray paint in a Lego-themed color (e.g., red, blue, yellow).
- Use masking tape for clean edges and multi-color designs.
-
Seal the Finish:
- Apply a clear protective coat for durability and shine.
How to store LEGO creations?

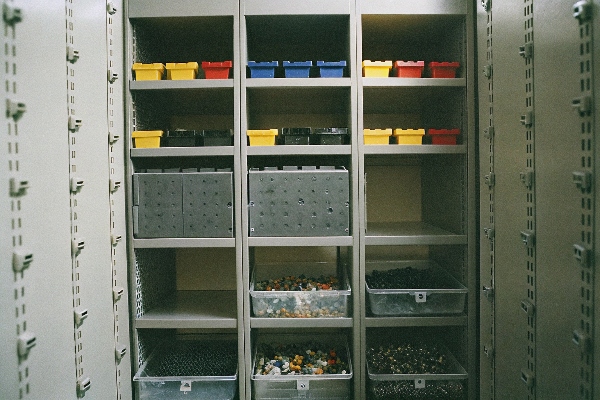
A Lego-themed cabinet can be both a playful decor piece and a practical storage solution. Its design makes it ideal for organizing loose Lego bricks, tools, or even displaying completed creations.
Maximize its functionality by adding adjustable shelves, bins, or hooks to cater to different storage needs.
Organizing Inside the Locker:
- Adjustable Shelves: Install shelves to create compartments for larger builds or storage bins.
- Bins and Drawers: Use labeled containers to sort Lego bricks by size or color.
- Display Area: Reserve a section for showcasing finished builds, especially prized models or custom creations.
- LED Lighting: Add strip lights inside the locker for a polished, professional display.
Challenges You May Encounter:
- Fitting Larger Creations: If your completed Lego sets are too large, remove or adjust internal shelves.
- Loose Bricks Mixing: Use clear dividers or bins with lids to prevent pieces from mixing.
- Dust Accumulation: Install doors with clear acrylic panels to keep creations visible yet protected.
1. Introduction
Upcycling an old locker into a Lego-themed cabinet is not just fun but also eco-friendly. It allows you to combine sustainable living with personalized design. Whether it’s for a child’s room, a playroom, or even a hobby space, this project brings practicality and creativity together.
2. Inspiration and Background
Why Choose Lego as a Theme?
Lego is beloved across generations for its versatility and vibrant designs. Using its iconic look as inspiration adds character and nostalgia to your storage solutions.
Why Upcycle?
Repurposing old furniture like lockers helps reduce waste and saves money. With a little creativity, you can turn a discarded item into a unique, functional piece.
3. Materials and Tools
Materials Needed:
| Item | Purpose |
|---|---|
| Old locker | The base for the project |
| PVC caps or foam discs | To mimic Lego pegs |
| Epoxy or liquid adhesive | For attaching pegs |
| Spray paint (multiple colors) | To achieve Lego’s vibrant look |
| Sandpaper (120-240 grit) | For smoothing surfaces |
| Clear coat spray | To protect the paint finish |
| Masking tape | For clean paint lines |
Tools Recommended:
- Electric Sander: Speeds up surface preparation.
- Paint Sprayer: Ensures even paint application for large surfaces.
- Drill and Screws: For installing internal shelves or hooks.
- Clamps: To hold pieces in place while adhesive dries.
Challenges and Solutions:
| Challenge | Solution |
|---|---|
| Rust on metal lockers | Use rust remover and sandpaper. |
| Adhesive not sticking well | Clean surfaces thoroughly before applying adhesive. |
| Uneven paint finish | Apply multiple thin coats and allow drying between layers. |
4. Step-by-Step Guide with Expert Tips
Step 1: Preparing the Locker
-
Inspect the Locker:
Check for rust, dents, or other damages. Use metal putty to fill holes or smooth out dents. -
Sand the Surface:
Sand off old paint, rust, or grime using 120-grit sandpaper for rough areas and 240-grit for finishing. -
Clean Thoroughly:
Wipe down the locker with a damp cloth and let it dry completely to remove any residue.
Step 2: Designing and Attaching Lego Pegs
-
Plan Your Layout:
Arrange PVC caps on the locker doors in a Lego-style grid. Use a ruler or template to maintain even spacing. -
Adhere Pegs Securely:
Apply epoxy or a similar adhesive to the base of each cap. Press firmly onto the locker and allow to dry for at least 24 hours. -
Test Durability:
Gently tug on the pegs to ensure they are firmly attached before painting.
Step 3: Painting the Locker
-
Apply Base Coat:
Spray the locker with a primary Lego color. Hold the spray can about 8 inches away for even coverage. -
Add Details:
Use masking tape to create clean edges for additional colors or patterns. Remove tape once the paint is dry to the touch. -
Seal the Paint:
Use a clear coat spray to protect the paint job and give the cabinet a polished finish.
Step 4: Assembling the Interior
-
Install Shelves:
Use a drill to secure brackets inside the locker, then add adjustable shelves. -
Add Accessories:
Include storage bins, hooks, or magnetic strips for added functionality. -
Optional Lighting:
Attach LED strips along the interior for a vibrant, illuminated look.
5. Upgrades and Creative Extensions
- Smart Features: Add IoT-enabled locks or Bluetooth speakers for a modern twist.
- Custom Designs: Hand-paint Lego characters or use decals for extra personality.
- Multi-Thematic Ideas: Expand beyond Lego and explore other popular themes like Marvel, Star Wars, or Minecraft.
6. Environmental and Social Value
Repurposing a secondhand locker helps reduce waste and promotes sustainable living. Sharing your project online can inspire others to take on similar eco-friendly DIY challenges.
7. Showcase and Celebrate
Celebrate your creativity by displaying your Lego locker in your home or sharing photos on social media. Consider creating a hashtag like #LegoLockerDIY to connect with fellow enthusiasts.
8. Additional Resources
- Supplies: Check online stores like Home Depot, Amazon, or Etsy for materials and tools.
- Inspiration: Browse Pinterest or YouTube for Lego-themed DIY ideas.
- DIY Communities: Join online forums for advice and project sharing.
9. FAQ: Common Questions
How long does it take to complete this project?
Most projects can be finished in 2-3 days, including drying time for paint and adhesives.
What if the PVC caps come loose?
Reattach them with stronger adhesive or reinforce with screws if needed.
How do I fix uneven paint spots?
Lightly sand the area and reapply paint in thin, even layers.
10. Conclusion
Creating a Lego-themed storage cabinet from a secondhand locker is more than just a DIY project—it’s an opportunity to upcycle, personalize, and have fun. Take your time, follow the steps, and enjoy the satisfaction of crafting something truly unique.

